
So you’ve set up an automation in Manychat and want your new leads to go to your CRM but can’t figure out how to do it.
Well, this is just the tutorial for you!
Here’s everything you need:
- Manychat PRO account
- Your CRM of choice (for this particular tutorial, we’re using FGF)
- Zapier! (you can also use similar tools like Make; the flow will be the same but the exact details would be slightly different)
Now, on to the actual setup…
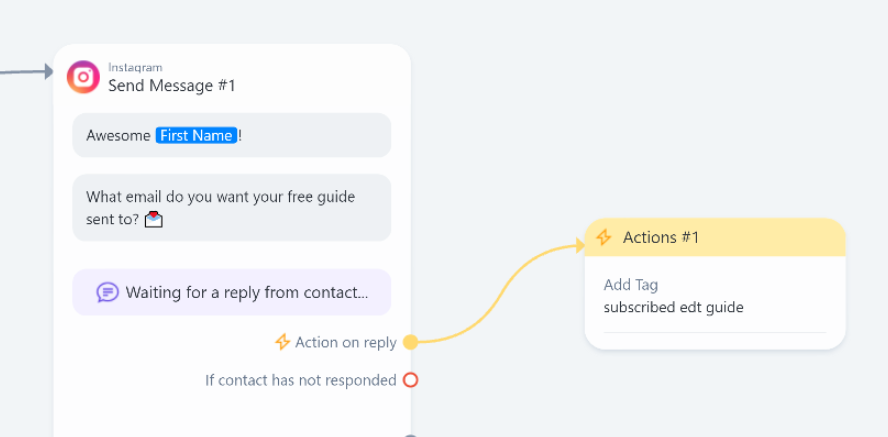
Step 1. Make sure that you tag your leads on Manychat.
There are many different ways to implement this automation but if you plan on setting up workflows for multiple lead magnets inside Manychat, tagging subscribers depending on the lead magnet they subscribed to would help you stay organized.
Here, I tagged the new subscriber after they provided their email address.
Step 2. Start your Zapier automation setup with Manychat as the trigger.
If you haven’t already, make sure to connect your Manychat account in Zapier – the instructions are pretty straightforward here. Do take note that this integration will require a Manychat PRO account.
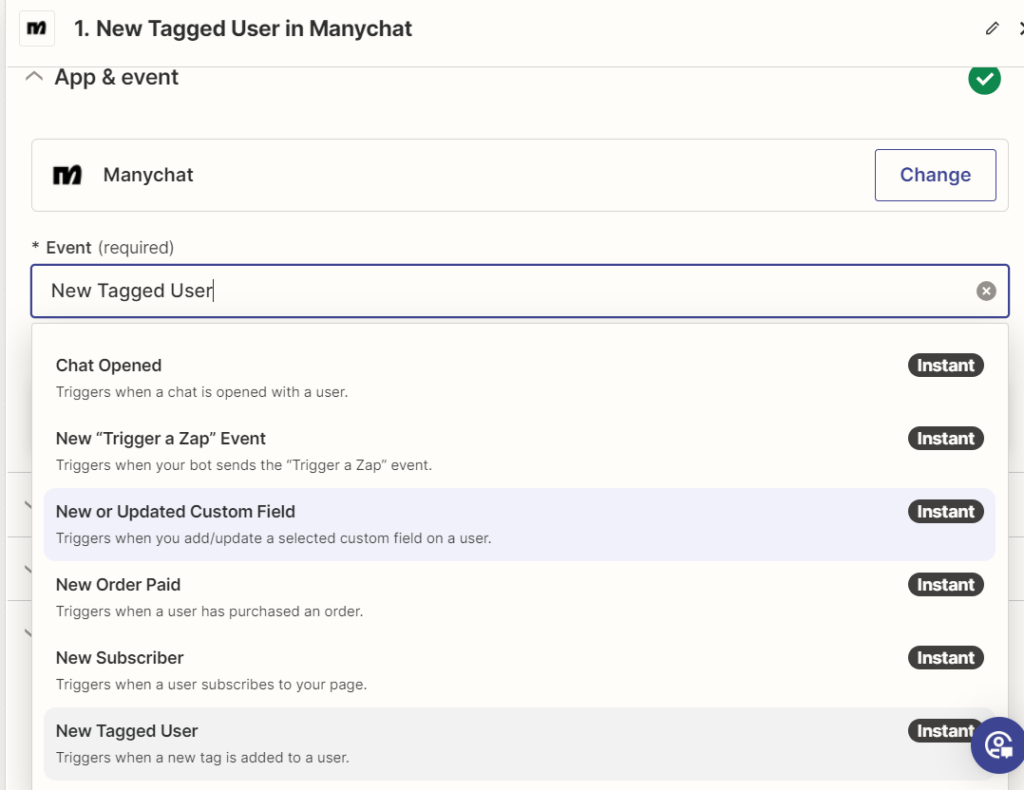
Step 3. Under Event, choose New Tagged User.
Like I said, there are many ways to trigger this zap but the best and most organized way (in case you set up multiple automations), is to tag the subscribers on Manychat.
The NEW TAGGED USER event in the trigger means that if a Manychat lead gets a new tag, they will go through this zap.
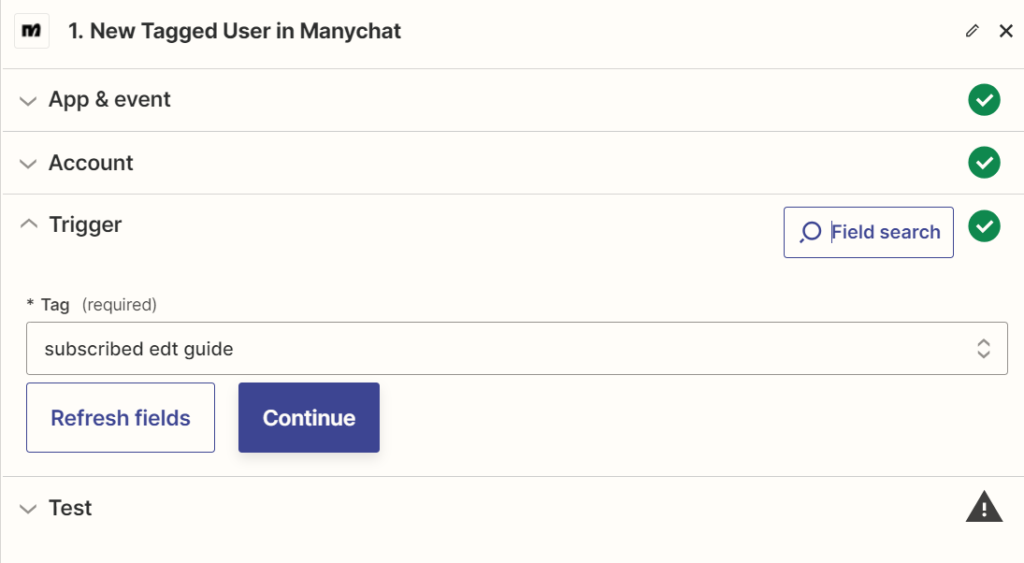
Step 4. Under the Account section, double check that you are connecting to the right Manychat account.
Step 5. Under the Trigger section, select the appropriate Manychat tag.
Step 6. Do a test by triggering the workflow in Manychat.
I highly suggest using the exact trigger as you would expect from your new leads (like commenting on a post or replying to a story, depending on how your Manychat workflow is set up), but if you’re already in the system, you can also find your details in there and manually add the tag to your profile.
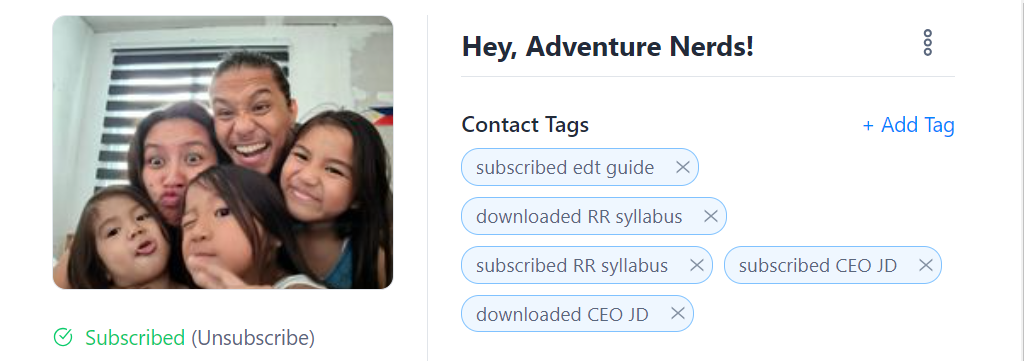
If the test is successful in Zapier, you should be able to see your details under the Test section.
Step 7. Next go back to your Zap and add an action. ‘
As of writing, FG Funnels (1.0.14) is the latest version.
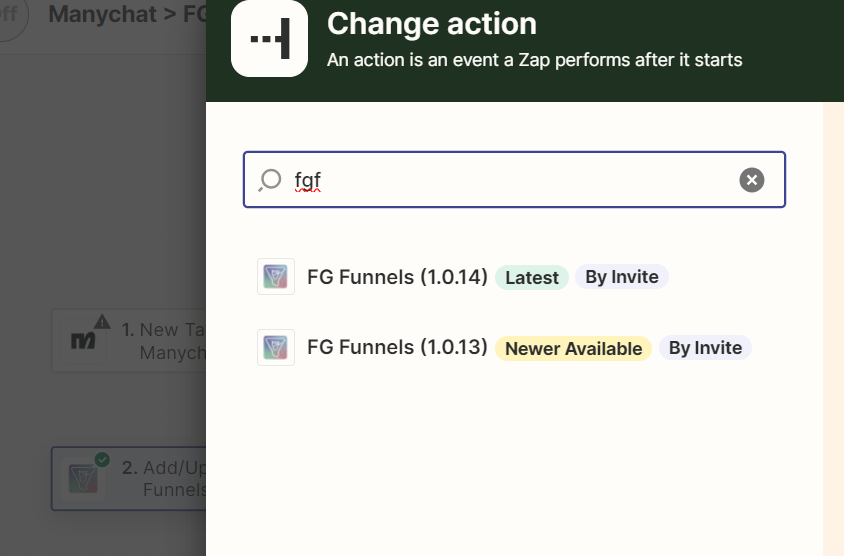
Step 8. Under the Event section, select Add/Update Contact.
Step 9. Under the Account section, connect your FGF account if you haven’t yet.
Step 10. Under the Action section, connect your data.
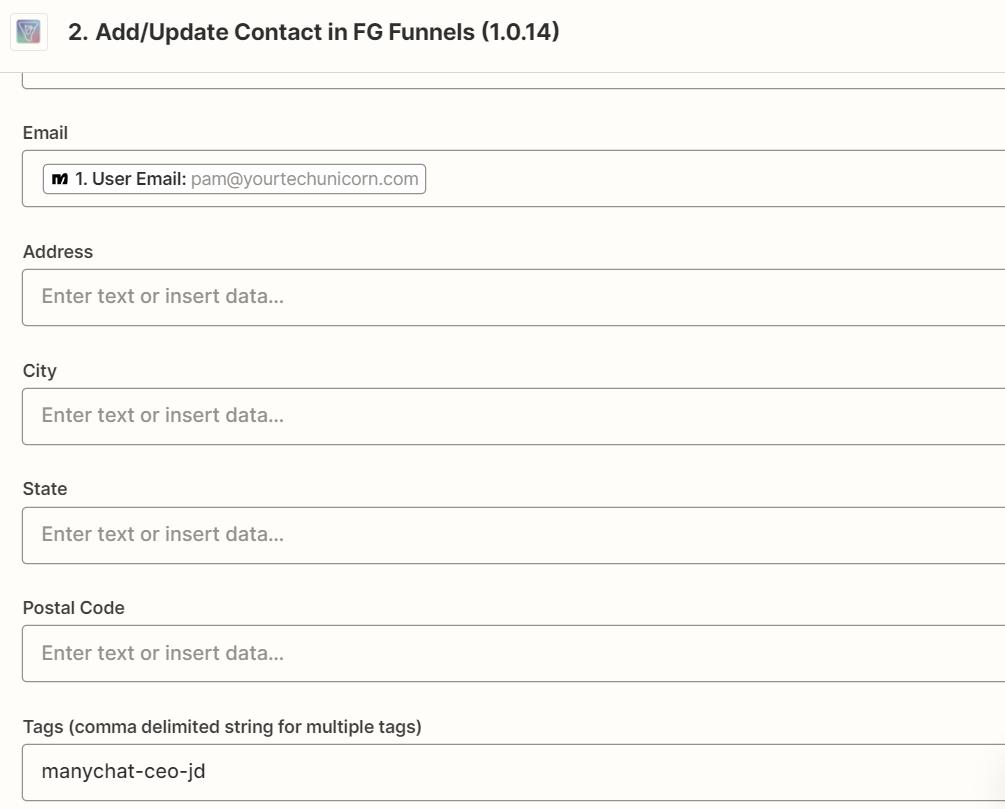
The most important fields include:
- Email: select User Email from your Manychat data
- Tag: manually type the equivalent FGF tag you are using for this particular workflow
- Mark As Lead: this is a required field which I always set to True
- First Name and Last Name: this is up to you; I typically don’t suggest using this because it would overwrite whatever info is already in FGF. This means if I’m already a subscriber and I opted for a lead magnet in Manychat (and I use a different name in IG, for example), it would change my name and screw up my records in FGF.
Step 11. Finish your test.
When this is successfully set up, you should see a success message in Zapier.

You can also double check in FGF if the new contact was added (this is for brand new subscribers who are not yet in FGF) AND if the new tag is added to the contact (this is what you check if the lead is already an existing subscriber in FGF).
That’s it. I hope that helped!